
Lets get started, modelling creatures ain’t easy. So I’m going to detail The general steps to reproduce this little beauty:

1. The body
The body is just a simple 5 sided shape with 5 segments:

Using select, scale and move. You create a sort of ratlike basic body:

This is then further shaped to give the arched back:

Next we want to remove faces where the legs will be extruded from:

2. Extruding Tail
Selecting the ‘bum’ vertexes and extrude with 9 segments:

Using Scale and move, make the basic tail:

The tail should be capped with preferably a point.
3. Extruding the Back Legs
Now legs are all essentially the same.
Select each set of 4 vertexes around the leg holes and extrude 5 segments:

Using the Scale and move, create the basic leg. Note how the ankle/knee joints have a segment to themselves:

We also don’t need to cap the legs as the paws will cover any holes.
You can also make the tail a bit more interesting:

4. Extruding the front legs and next
As we previously did with the back legs. Select and extrude 3 segments from the front leg hole:

As we are in this area. And now the shoulder area is filled, we can also extrude the neck.
First select all the shoulder vertexes:

And then Extrude 3 segments:
Using Scale and move, select the leg vertexes and shape into the basic front legs, and also the neck:

5. Basic Colouring
Select and colour vertexes with the back being a darkish grey and the front a lightish variant.
The Tail and leg extremities are tinted pink, with the tail being more tinted towards the tip:

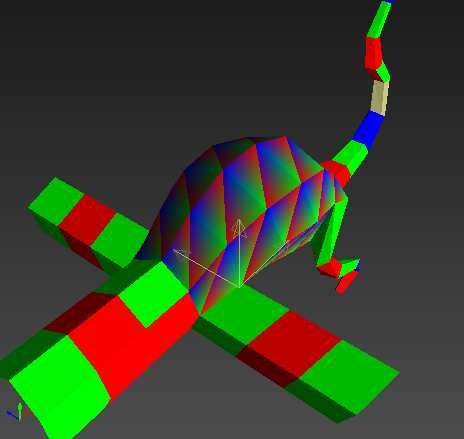
6. Extruding the Head
The Head is the most difficult thing to model. The best suggestion here is to do an image search for rat and look how a rat’s head actually looks.

Above I have further extruded 2 segments to the head. The orange sticky out bits are the eyes and eye sockets. Lets have a look at what is going on here in a separate model:
7. Creating the Eyes
We are using a test object here to demonstrate the steps for eyes.
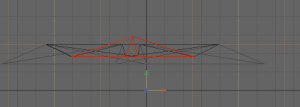
First we have the hole where the eyes will sit, and four (or more) vertexes selected:

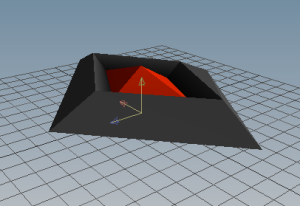
Next we extrude a single segment for the eye sockets. We extrude OUT and also colour the extrusion orange to make things simple to see and grasp:

Finally we cap the extrusion with a centre point (and colour it red):

Colouring and finishing:
Next we make sure the base (where the eye socket and eye sit) is the correct colour. In this case it will be a grey:

Selecting the orange (eye socket), colour it the same grey, with the top vertexes darker:

Selecting the top vertexes, we now move the finished eye into place:

You should now see how the eyes are constructed and why the vertex colours feature gradients.
8. Finishing the Head
You will need to extrude and cap the lower jaw and upped jaw now, and also colour the head and inside of the mouth:

9. Modelling the teeth
The teeth are simple 3 sided triangle pyramids with a yellow colour:

You just need to add the teeth to the model:

10. Paws
The paws are a simple 7 sided 1 segment high polygon which has had four ‘toes’ extruded, scaled and moved:

They are then duplicated 4 times with the left being the flipped versions. Note flipping may turn faces the wrong way, so you may need to refill them back!
Enjoy…

It looks really great. I love low poly modeling, it’s my favorite art form. It’ll be great to see him in game.
For my own low poly workflow, usually when I do the hip of a monster I extrude out a single box sideways and then extrude the leg from the bottom of the box. it creates a kind of “L” joint which deforms nicely in animations.
Anyway, everything looks great, I’m excited to see what’s coming next.
Lots of sideways steps (mainly with creating 3d stuff), but I’m finally starting to work with map data again